

How to setup VMware Workstation 12
1) Download the ISO package from here:
2) Unzip the downloaded package
3) Start VMware Workstation
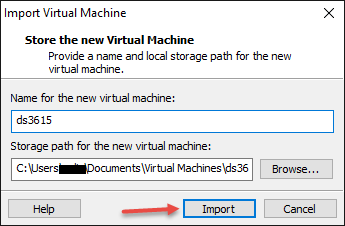
4) Go to your unpacked package and doubleclick the ds3615.ovf file.
Windows will ask you with what program you want to open the file. Choose VMWare Workstation. The following message will appear. Give it a name and click import.
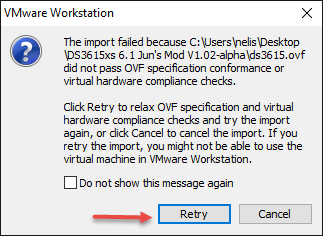
You will receive an error. Click retry.
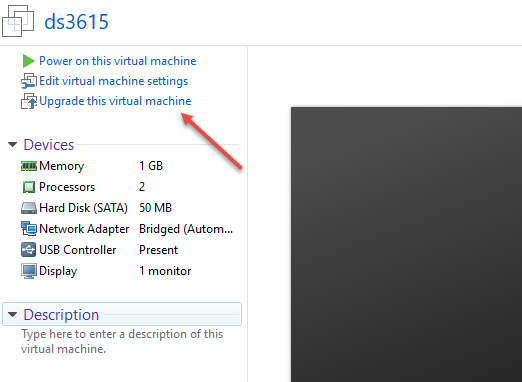
It will continue and will show your vm configured
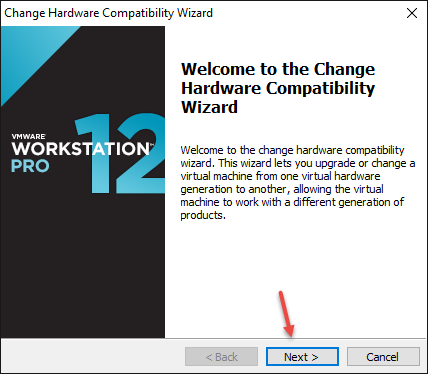
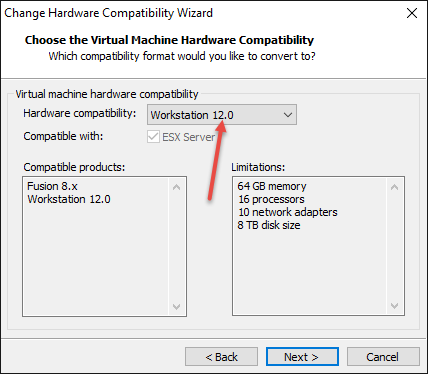
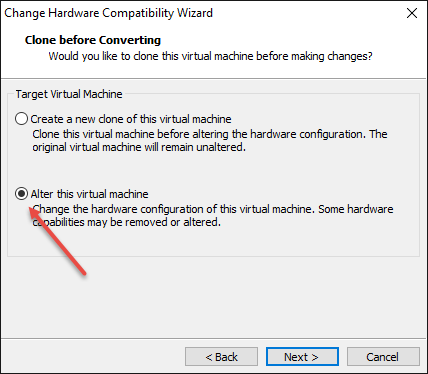
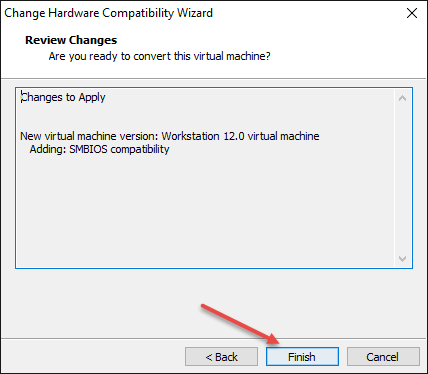
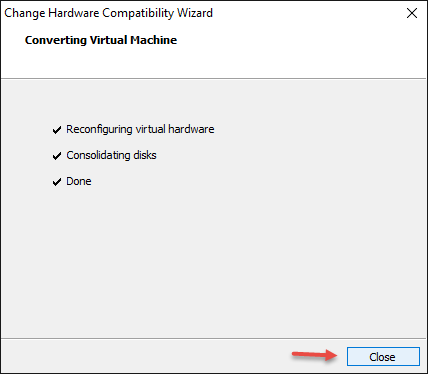
5) Click on Upgrade this Virtual Machine.
And follow the red arrow.
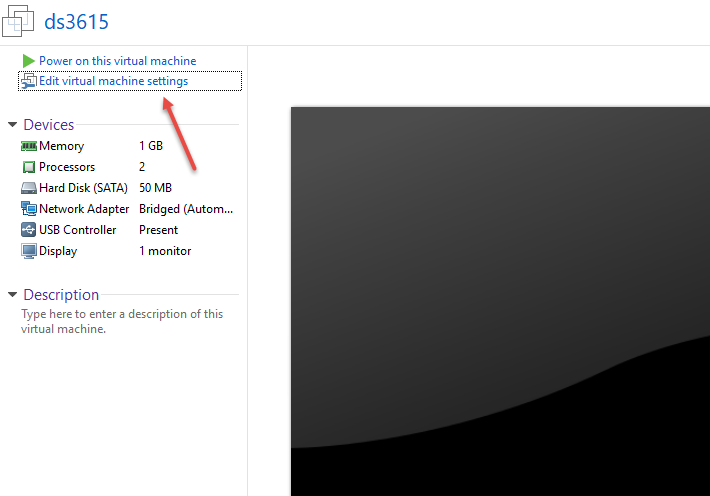
6) Click on Edit virtual machine settings.
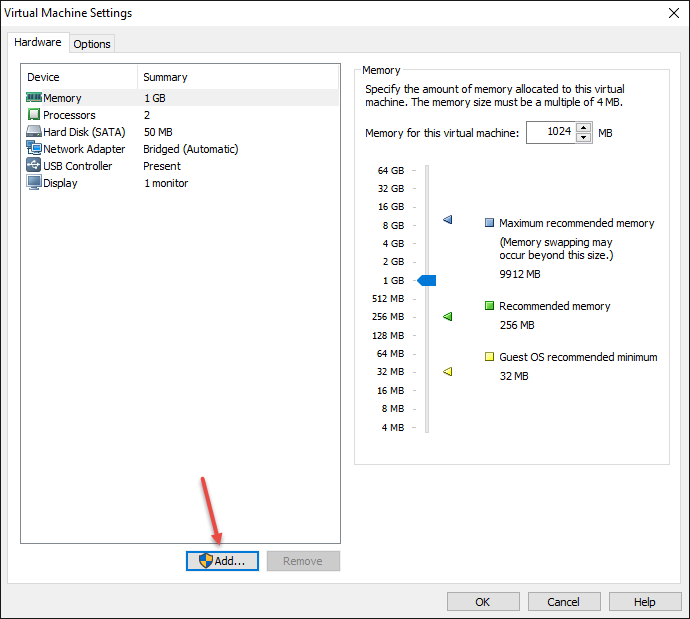
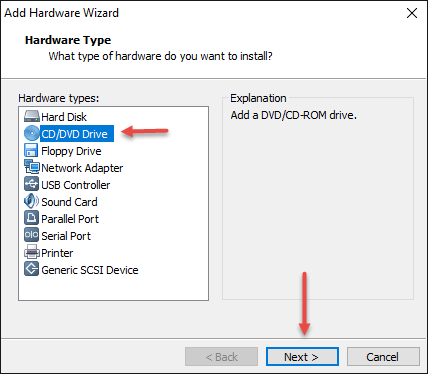
And Add a CD/DVD Drive.
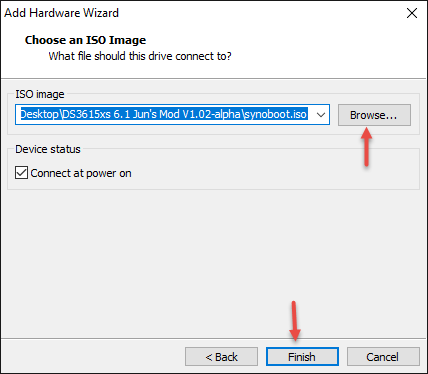
Choose Use ISO Image.
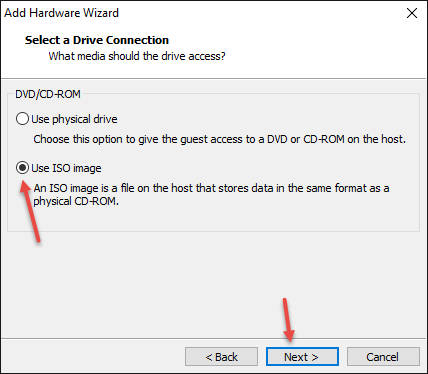
Browse for the ISO and select synoboot.iso and click on Finish
7) Go to the Options tab and select Linux as Guest Operating system with Version Other Linux 3.x Kernel 64-bit

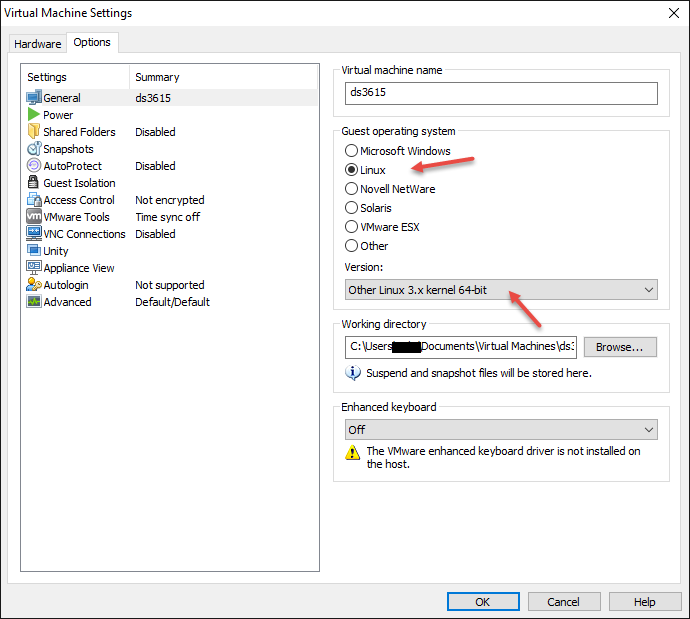
After selecting the Guest OS Click on OK.
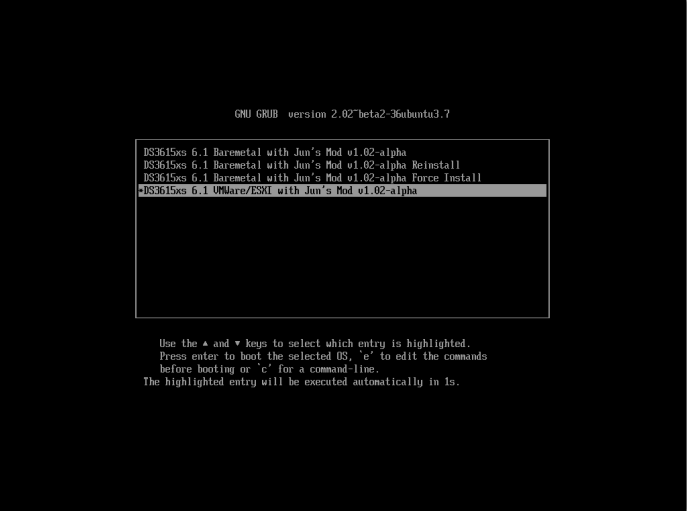
8) Power on the VM to check if it starts up.
We now know that the VM works so it’s time to configure the disks. So shut it down.
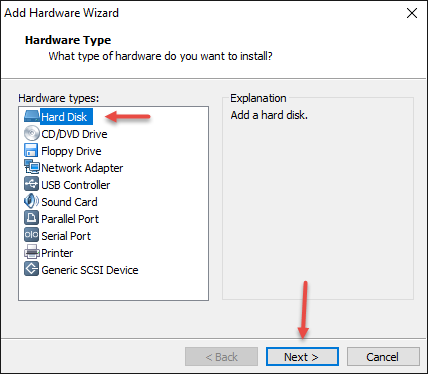
9) Add a SCSI Disk, click on Edit virtual machine settings
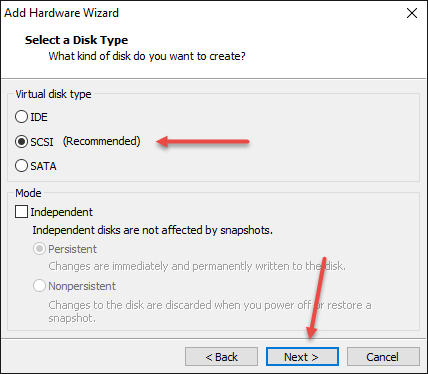

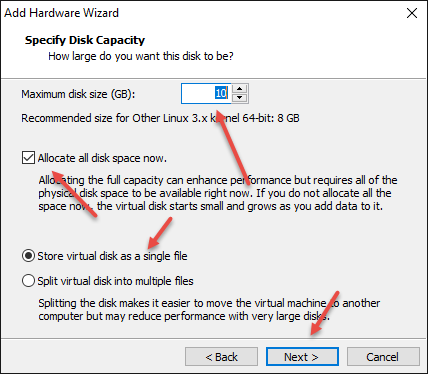
Give the disk a name, like disk1. (i did not)
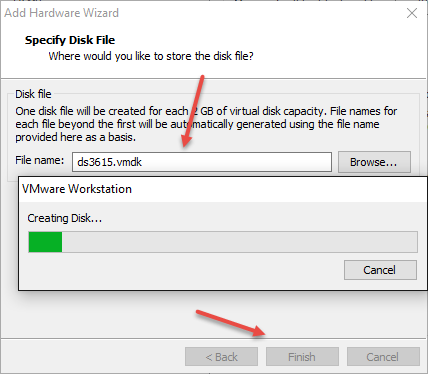
If you want to add more disks, just do the same like above.
10) Power up the VM. Wait a minute and start the assistant on your computer or use http://find.synology.com
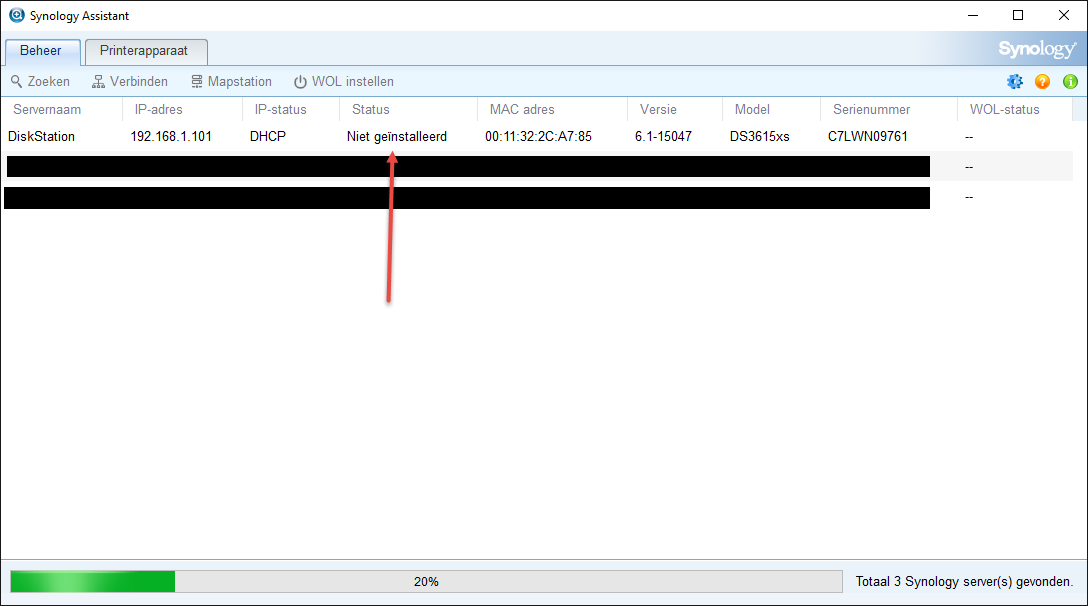
Choose your server in the list and go to the web installer. Install DSM with the download button. No need to manually install a pat file. Just install your box like you always do and always uncheck the synology stuff like improvement or quickconnect.
After the install create your volumes and have fun! You can even update DSM to the latest update without problems..
11) You now have a working XPEnology Box!! FUN!!
works fine with new files
can it installed on VMware 15? I have issue with device guard. I have turn off device guard but it still say you need disable device guard
Failed to open disk: C:\Users\User\Desktop\DS3615\synoboot.vmdk. Reason: The system cannot find the file specified.
Hi all,
I have followed step by step this roadmap on a VMware® Workstation 12 Player 12.1.1 build-3770994.
Everything is fine until the browser installation process (http://find.synology.com).
When installing the DSM i’ve got a “Failed to format the disk. (35)” error.
Any idea?
Here are some screenshots:
https://dl.naslain.com/XPEnologyDS3615xs6.1JunModV1.02-alphaISO_VMware_01_Settings.PNG
https://dl.naslain.com/XPEnologyDS3615xs6.1JunModV1.02-alphaISO_VMware_02_Boot.PNG
https://dl.naslain.com/XPEnologyDS3615xs6.1JunModV1.02-alphaISO_VMware_03_SynologyAssistant.PNG
https://dl.naslain.com/XPEnologyDS3615xs6.1JunModV1.02-alphaISO_VMware_04_Start.PNG
https://dl.naslain.com/XPEnologyDS3615xs6.1JunModV1.02-alphaISO_VMware_05_EraseDisks.PNG
https://dl.naslain.com/XPEnologyDS3615xs6.1JunModV1.02-alphaISO_VMware_06_StartInstall.PNG
https://dl.naslain.com/XPEnologyDS3615xs6.1JunModV1.02-alphaISO_VMware_07_Error35.PNG
I precise that I’m behind a firewall on a local network.
Thanks for your feedback,
Chris
Guys, anyone having issues with DSM not working after restart…
Installing the latest version doesn’t work. I spent hours trying all kinds of things. Once i picked the pat file manually – it worked.
So download it from here:
https://archive.synology.com/download/DSM/release/6.1/15047/DSM_DS3615xs_15047.pat
And then choose the manual install option
Hi,
I’m trying to use Xpenology “XPEnology_DS3615xs_DSM_6.1.x-quicknick-3.0.zip” vmware Workstation.
I find the ip address of the dsm (virtual machine) but cannot log in as administrator.
Would i please know what is the default login and password for XPEnology_DS3615xs_DSM_6.1.x-quicknick-3.0?
Can you please provide that?
Thanks
Hi,
Thank you for the tutorial. I did the install as per procedure + changing synoboot.iso to synoboot.img and back, no errors during the installation.
Used url http://find.synology.com and the page with “Install the latest DSM .. ” appeared, selected “install now” button and “installing diskstation manager, wait for 10 mins…” message appeared.
Waited for the progress bar to complete then the surprise screen appeared “failed to connect”. After this screen the DSM machine is not visible in the network no IP is assigned for the VM MAC address in DHCP server. Restarting was not helpfull at all and access to the local console is not available.
The machine screen is looking ok, i selected DS3615 6.1 VMWare boot option, everything is looking ok but DSM is not visible in the network.
I tried same on several machines but without success, any suggestion is appreciated.
Best regards,
Daniel
Nothing work.
After .pat instaled cant find DSM on network …
Just create copy of synoboot.iso in the same folder and rename it to synoboot.img
Hi,
it finally works for me to have DSM 6.1.5 run on ESXi 6.5.
Here are my findings:
– if you upload synoboot.img and synoboot.vmdk to a ESXi datastore then this results in 1 vmdk-file i.e. obviously ESXi is merging the 2 files into 1 file
– the resulting disc (vmdk-file) is a 50MB disc used to start the system. This disc should be connected via IDE and disc modus should be “independant” and “non-persistent”
– the VM then starts from disc but find.synology.com was not able to detect the DiskStation nor did the Synology Assistant. It appears that the VM does not get an IPv4-adress
– I analyzed via Wireshark and have seen that after 2 IPv6-pakets no more IP-traffic could be seen on the wire, especially no DHCP-traffic (therefore the VM could not be found by the synology assistant)
– in the environment I used I have no control on the Router so I therefore used my own private network on ESXi (without external adapters) and used a DHCP-Server on Windows (open dhcp server – https://sourceforge.net/projects/dhcpserver/ )
– now the VM was able to receive an IPv4-adress (I could see this in the DHCP-Server GUI)
Hope this helps!
Wolfgang
I’m trying this out on an ESXi 6.5 machine but it doesn’t seem to be getting any IPs from my DHCP server. The other VMs I tried creating get leases just fine. Any ideas?
I have the same issue. My vm work fine on Vmware Fusion. I imported it on my esxi and no dhcp lease on my router. Anyone have a workaround ?
It’s working! After a battle on my esx the vm works, with the latest version of DSM.
What I’have done ?
– Add two NIC on the VM
– Supress all SCSI controller and set all disk on a SATA controller
Then it’s working! 🙂
Thanks
It works for me.
1. Rename file synoboot.iso = synoboot.img
2. Import OVF
3. Unzip file archiver again and mount file file synoboot.iso
i try clone synoboot.img and rename = synoboot.iso but its not working
4. step by step
good luck.
Hi,
Great post!
It worked, but update from 6.1.3 to 6.1.4 failed. It boots to the first screen in your topic, but the synology assistant never finds mij XPenology. I think I have to start over…
No bootable image synoboot.iso.
Hello,
I ve this error : ”
Error while converting to a virtual machine: Failed to open disk: C:\Users\Bureau\Downloads\DS3615xs 6.1 Jun’s Mod V1.02-alpha ISO (1)\synoboot.vmdk. Reason: The system cannot find the file specified.”
To get around the error (file not found) above:
After downloading the zipped file, un-zip and rename the contained .iso to .img.
Then the tutorial will work as shown above.
http stops working after a few hours / days
Just downloaded, always tells included “synoboot.vmdk” with 1KB size not readable for *.ovf import or using in existing machine config.
When just using the “synoboot.iso” with provided vmx doesnt find boot system on it.
Are files defect, or are there steps missing in this tutorial?
– Can not import ovf file
– You will receive an error. Click retry.
– “Failed to open disk: c: \ xxxxx Reason: The system cannot find the file specifie ,,
WMware Workstation 12 Pro 12.1.1 build-3770994
same Problem !
Download her the last img : https://mega.nz/#F!BtFQ2DgC!JgomNP3X8V9EuwxL4TXbng!cl8TEQ6Q
Put it in the same folder and try again 🙂
SAme problem
Download link is broken.
It’s possible to convert img to iso ?
Because each new release have only img